
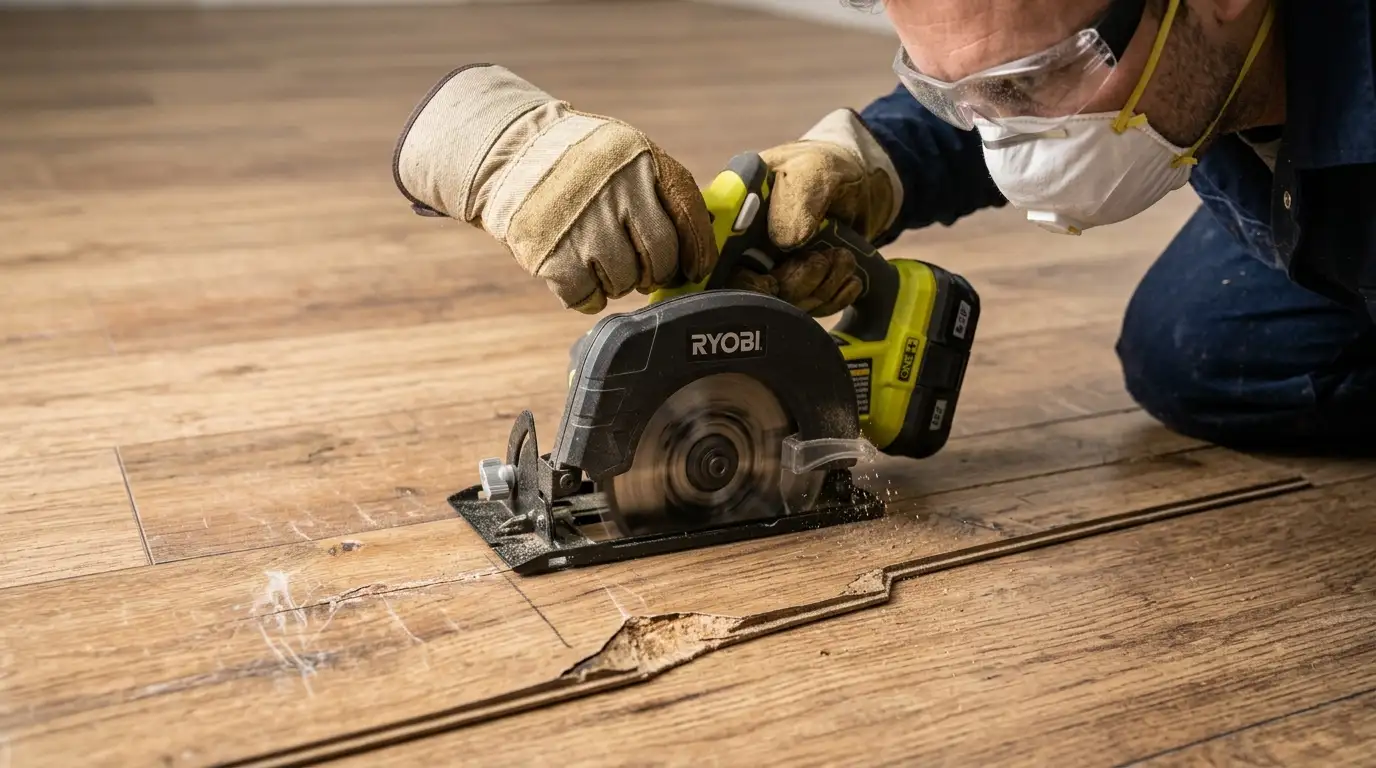
A damaged laminate plank does not always mean replacing the entire floor. In many cases, you can remove and replace just one board without disturbing the rest of the room.
The correct method depends mainly on where the damaged plank is located and how the laminate was installed. This guide explains How to Remove and Replace Damaged Laminate Floor Boards, including the easiest wall-access method and the cut-out method for damaged boards in the middle of a room.
| Situation | Best Solution | DIY Difficulty |
| Damaged board near a wall | Remove boards from nearest wall | Easy–Moderate |
| Damaged board in centre | Cut out and replace plank | Advanced |
| Light scratch | Repair kit | Easy |
| Deep scratch or chip | Repair or replace | Moderate |
| Swollen board | Replace | Moderate |
| Broken locking edge | Replace | Moderate |
| Multiple damaged boards | Professional assessment | Moderate–Advanced |
Can You Replace Just One Laminate Floor Board?
Yes. In most cases, a single laminate floor board can be replaced without having to come up with the entire flooring surface, particularly if the flooring installation is floating and click-locked.
If the broken plank is near to a wall, you should be able to generally unclick the boards until you get to the plank that’s broken. In the middle of the room, broken boards can sometimes be carefully cut out and replaced one by one.
Floating Laminate Flooring
Floating laminate is attached to each other but not to the subfloor. This makes it easier to replace individual planks.
Glued Laminate Flooring
The advantages of glued laminate are that it’s harder to take off, since the laminate is firmly attached to the floor below. These repairs will need to involve cutting, adhesive removal and further subfloor preparation.
Also Read: Top Wood Laminate Flooring
Common Causes of Damaged Laminate Flooring
A knowledge of the cause of the damage to the board helps to make sure that the new board does not experience the same issue.
Water Damage
Laminate joints allow water in and cause the fibreboard core to expand. Most spills are harmless if cleaned up promptly, but extended exposure to water may cause permanent damage to the plank.
Swollen Boards
Kids with raised or raised edges tend to become moist. The poor expansion gaps may also result in boards pushing and lifting.
Deep Scratches
Laminate repair products can often be used to repair light scratches. If these scratches go down to the layer underneath the decorative layer, then they may need to be replaced.
Burn Marks
Minor surface burns can be mended, but deep burns are typically irreversible and hard to cover up.
Heavy Furniture Damage
Furniture or heavy objects can dent, crack and damage the edges when you are dragging these or putting heavy items on them.
Pet Damage
Laminate can be ruined over time by pet claws, trapped dirt and moisture from accidents, especially in high traffic areas.
Impact Damage
Heavy objects or tools dropped or thrown on the surface may cause chipping or damage to the click-lock joint. Typically, the only repair that can be done for broken locking edges is to replace the plank.

Should You Repair or Replace the Board?
Not every damaged laminate plank needs to be removed. Small cosmetic problems can often be repaired, while structural or moisture-related damage generally requires replacement.
| Problem | Repair | Replace |
| Fine scratch | Yes | Usually no |
| Small chip | Often | If deep |
| Deep scratch | Sometimes | Often |
| Broken locking edge | No | Yes |
| Burn mark | Limited | Usually |
| Small dent | Sometimes | If severe |
| Swollen board | No | Yes |
| Waterlogged board | No | Yes |
| Large crack | No | Yes |
| Several lifting boards | Investigate first | Often |
According to Quick-Step, minor laminate damage can often be repaired, while a board that is badly damaged may need to be replaced rather than replacing the entire floor.
Source: Quick-Step – How can I repair a damaged laminate board?
Tools and Materials You’ll Need
The tools needed will vary from the replacement technique used.
- Replacement laminate plank
- Oscillating multi-tool
- Cutting tool for cutting holes or slots in a circular pattern.
- Chisel
- Hammer
- Pull bar
- Tapping block
- Measuring tape
- Pencil
- Painter’s tape
- Flooring Adhesive (as needed)
- Vacuum
- Safety glasses
- Hearing protection
- Dust mask

Safety Tips Before You Begin
Always check what is underneath the flooring before making cuts. Electrical wiring, plumbing or underfloor heating can be damaged if the saw blade is set too deep.
Use dust, hearing and eye protection. Adjust blade depth to the thickness of the laminate itself – do not push tools into the healthy adjacent boards.
Method 1: Replace a Laminate Board from the Wall
The easiest and safest way to place a laminate board is to place it from the closest wall.
- Find the nearest wall. Take the shortest path to the broken plank.
- Take off the skirting or scotia. Take your time to work carefully to be able to reattach later.
- Take a picture of the floor, before you put the furniture in place. This will make the assembly easier.
- Number the boards. Call out the undersides of the removed planks numbered.
- Click on the 1st row to unlock it. Pick up the boards in the order of the click-lock system.
- Continue towards the damaged board. Do not bend or force locking edges.
- Cut out the broken plank. Inspect underlay and around joints.
- Put in replacement board. Check if the size and locking profile match.
- Put the removed boards back in place. Stagger and stick to original pattern.
- Inspect the gap between the expansion. Maintain manufacturer’s recommended distance from walls.
- Refit the trim. Add skirting or scotia, but not attach to the floating floor.
This is the safer option, but will take more time if the damaged plank is not near the wall.
Method 2: Replace a Laminate Board in the Middle of the Floor
Removing a plank from the middle of the room may not be possible if the plank is in the middle of the room. Rather, the damaged board may be cut into segments and taken off one at a time.
- Indicate the damaged board. Ensure that it is marked clearly with painter’s tape.
- Check plank thickness. Adjust the saw blade so it will not cut much into the subfloor.
- Indicate cutting lines. Keep the first cuts away from neighbouring locking joints.
- Cut in the middle. Make controlled lengthwise cuts.
- Make corner relief cuts. This simplifies cutting the middle section out.
- Caisealadh an áitríon. Carefully use a chisel.
- Discard the rest of the edges. Try to pull them in toward empty centres—not healthy boards.
- Clean the opening. Vacuum dust and debris from all locking joints.
- Inspect the underlay. Repair/replace damaged parts.
- Dry-fit the new plank. Check the size, color and orientation before editing.
- Cut back locking edge, if necessary. When replacing, some methods involve the cutting off of the lower groove.
- Use adhesives as needed. Only use adhesive approved for use with flooring.
- Fit the replacement plank. Work with the whole joint first and then position the changed side.
- Carefully use the tapping block. Never hit the laminate with a hammer.
- Clean excess adhesive. Take out before it dries.
- Check the final fit. The board should be flat with even and tight joints.
The middle-board method requires much greater cutting accuracy. If you do not feel safe using power tools near completed flooring, it may be safer to have a professional replace the flooring.
How to Match the New Board with Existing Flooring
Most often, the best replacement plank will be a plank that has been removed from the original installation. Examine the manufacturer, product line, size, thickness, surface finish and locking profile.
Sunlight and natural ageing will also cause colour change. Store replacement floor next to the existing floor before installation, and view it in daylight and under artificial light. It can also be less noticeable if the repair is done to match the grain direction.
Common Mistakes to Avoid
It is easy to cause several boards to be damaged by making a few mistakes during removal.
- When it comes to trimming away the subfloor, you don’t want to go too far.
- Damaging the underlay
- Pinning the piece of the subject in a non-locking manner
- Eliminating expansion gap
- Using unsuitable adhesive
- The plank is installed in the opposite direction to the original installation.
- Ignoring grain orientation
- If there is a moisture issue, boards must be replaced before being fixed.
- Smashing the laminate using a hammer straight on.
- Not doing a dry-fit.Not performing the dry-fit step.
Most of these errors can be avoided by checking the replacement before cutting or gluing by taking a few extra minutes.

When Should You Call a Professional?
Professional help is recommended if the damage covers several boards, the floor has suffered major water exposure, the laminate is glued down or there are signs of subfloor damage.
A timber flooring installer can also assist should the board be placed in an area that is visible or the original flooring is hard to match. Poorly fitted replacement boards are very noticeable in more intricate installations like detailed parquet flooring melbourne and solid timber flooring melbourne, particularly around high-quality surfaces.
How to Prevent Laminate Floor Damage
Minimal maintenance and moisture control can help prevent most laminate damage problems.
- Add felt pads under furniture
- Lift furniture, do not drag.
- Make sure that entrance and protective mats are used
- Clean spills immediately
- Avoid excessive water while cleaning
- Keep pet nails trimmed
- Vacuum dirt and grit regularly
- Check and control humidity in the house.
- See if there are any slow leaks in appliances.
- Keep extra boards after installing
Spare planks are especially handy because it can be hard to find a match for older laminate, if it becomes available.
Final Thoughts
Having the How to Remove and Replace Damaged Laminate Floor Boards knowledge can be useful for fixing a small damaged spot, without replacing a decorative, good-looking floor. Boards on walls are typically the easiest to replace, as the floating floor is usually easily removed for the time being.
Additionally, the central area of a room can be replaced one by one, although the cut-out process needs to be well measured and properly cut. When replacing with any type, always determine the cause of the damage, particularly if water, swelling or lifting is a factor.

Frequently Asked Questions
Can you replace a single laminate floor board without removing the whole floor?
Yes. A single plank can often be replaced without removing the entire floor. The easiest method is to work from the nearest wall, while central boards can sometimes be cut out.
How do you replace laminate flooring in the middle of a room?
The damaged plank is cut into smaller sections and removed towards the centre. A replacement board is then prepared so it can fit into the existing opening.
Can swollen laminate flooring be repaired?
Usually not permanently. Once the laminate core has swollen, replacement is normally the better option. The moisture source must be fixed first.
What tools do I need to replace a damaged laminate plank?
Common tools include a circular saw or multi-tool, chisel, hammer, tapping block, pull bar, measuring tape, vacuum and safety equipment.
Is it cheaper to repair or replace laminate flooring?
Repairing a small scratch or chip is cheaper. For swelling, cracks or damaged locking edges, replacing only the affected plank is usually more economical than replacing the entire floor.
How much does laminate floor repair cost in Australia?
The price varies depending on access, labour and replacement material. Small professional repairs are normally charged as individual service jobs rather than a simple per-square-metre rate.
Can water-damaged laminate flooring be fixed?
Minor surface exposure may not cause permanent damage. Once the board has swollen or distorted, it normally needs to be replaced.
How long does it take to replace one laminate floor board?
A straightforward repair can often be completed relatively quickly. Repairs requiring several rows to be removed or a central plank to be cut out will take longer.
Can you reuse laminate flooring after removing it?
Yes, provided the boards are removed carefully and the locking joints remain undamaged. Broken or distorted planks should not be reused.
Do you need glue to replace a laminate floor board?
Not always. Floating laminate normally uses click-lock joints, but some centre-board replacement methods require a small amount of suitable adhesive on modified locking edges.


2 Responses
I have a laminate floor with just one or two badly damaged boards. Is it usually possible to replace only those boards without disturbing the rest of the flooring?
Yes, it can be possible to replace just one or two damaged laminate boards, particularly with a floating click-lock floor. The exact approach depends on the locking system, where the damaged boards are located and whether spare boards from the original installation are available.
If the damaged boards are in the middle of the room, they may need to be carefully cut out and replaced rather than dismantling the floor back from a wall. Matching the colour and pattern can also be difficult if the flooring has aged or the product has been discontinued. A flooring professional can assess the locking system and choose the least disruptive repair method.