
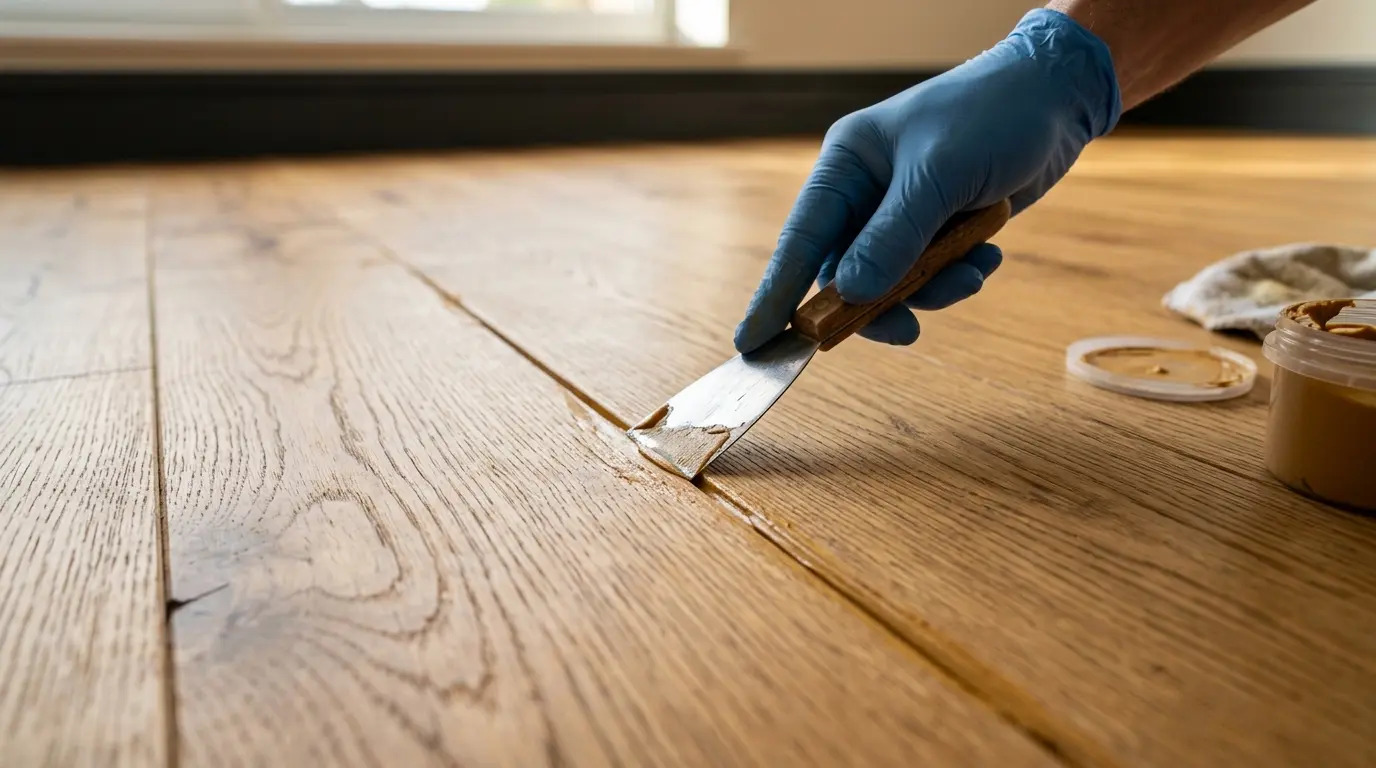
To fix unsightly spaces between your timber boards, the most effective methods include using a custom resin-sawdust mixture for small cracks, colour-matched flexible acrylic caulking for seasonal movement, or inserting genuine timber slivers for wider gaps. In Melbourne, where the climate famously shifts from intensely dry heat to damp, freezing winters, old wooden floors naturally expand and shrink, creating these draughty voids over the decades. Understanding exactly how to fill gaps between timber floorboards? is essential to improving your home’s insulation, stopping dirt accumulation, and restoring the pristine, seamless beauty of your interior spaces.
| Filling Method | Key Info & Application | Why It Matters |
|---|---|---|
| Resin & Sawdust Mix | Best for gaps under 3mm. Mixed using dust from the actual floor. | Helps achieve a close colour match and blend with the existing timber. |
| Timber Slivers (Fillets) | Best for wide gaps over 5mm. Thin strips of wood glued into the void. | Provides a durable repair that can accommodate the natural movement of the floor. |
| Flexible Acrylic Caulking | Best for medium gaps between 3mm and 5mm. Applied using a caulking gun and smoothed over. | Offers some flexibility to accommodate seasonal movement without cracking or pulling away. |
| Leaving Them Alone | Applies to very fine, hairline gaps in older heritage properties. | Allows the timber to continue its natural movement and avoids unnecessary filling where gaps are minor. |
Proven Methods To Fill Gaps In Wood Flooring
Wood will absorb moisture from the air when humidity is high, such as in Melbourne during winter, causing the floorboards to expand and the gaps between them to become smaller. When humidity is lower, as it typically is in Melbourne during summer, wood releases moisture and contracts, which can make the gaps more noticeable. Over a long period of time, repeated expansion and contraction may contribute to permanent movement or changes in the floorboards, with gaps potentially developing between them. The proper method for filling gaps in wood floors depends on factors such as the width of the gaps, the condition of the floorboards, and whether you plan to sand and refinish the floor.
Method 1: The Resin and Sawdust Slurry
This is the standard for gaps of small to medium size (up to 3mm). Once a professional floor sander starts sanding, they pick up the fine, clean sawdust that is produced by the first pass of sanding. They then add a special clear resin to this dust to form a thick paste. The paste is aggressively trowelled over the entire floor, and deep in the gaps. The colour match is perfect since the paste is produced of the identical wood as your floor! After it dries, the floor is sanded again and a perfectly smooth solid surface is achieved.
Method 2: Timber Slivers (Pine or Oak Strips) is another method.
If it’s a large and drafty gap (5mm – 10mm or more), a liquid paste will fall through to the subfloor or crack out in a year. The most expensive and historically accurate is timber slivers. They are long strips of reclaimed lumber (such as pine or oak) cut into a wedge shape. The tradesperson glues the sliver in place with PVA wood glue and gently beats it into place with a mallet until it is securely lodged in the gap. When dry the excess wood extending above the floor is planed or sanded level. This is a very strong technique since the sliver is like one of the other floorboards and expands and contracts in tandem with the other floorboards.
Method 3: Flexible Coloured Caulking
If you’re thinking of how to seal the spaces between timber floor boards, without undertaking an extensive and dusty sanding job, then flexible acrylic sealants are your best bet. These are in tubes to fit standard timber colours (e.g. Walnut, Baltic Pine or Jarrah). With care, you pour the filler in the crack and clean the excess off with a moistened sponge. It is very elastic and stretches with the movement of the boards; thus it is very reliable.

How to Fill Wood Floor Gaps Without Sanding
Filling timber floor gaps without sanding the entire floor is possible when the boards are structurally sound and the gaps are suitable for a flexible filler. This approach is generally better suited to small and medium gaps where you want to preserve the existing finish.
Step 1: Check the condition of the boards
Before applying any filler, walk across the affected area and check for movement, bouncing or raised boards. Do not fill gaps over loose or unstable boards, as movement can cause the repair to crack or separate.
Step 2: Measure the gaps
Check the approximate width of the gaps at several points. Very fine gaps may not require filling at all, while gaps of around 3mm to 5mm can be suitable for a flexible acrylic caulking product. Wider gaps may require timber slivers or another repair method rather than a surface-applied filler.
Step 3: Clean the gaps thoroughly
Remove compacted dirt, dust and debris from the gap using a scraper, narrow cleaning tool or suitable vacuum attachment. The filler needs a clean surface to adhere properly. Take care not to damage the edges of the existing boards or their finish.
Step 4: Choose a colour-matched flexible filler
Select a flexible acrylic timber-floor caulking product that is compatible with the existing flooring finish and close in colour to the boards. Avoid rigid wood putties that cannot accommodate normal seasonal movement.
Step 5: Apply the filler carefully
Using a caulking gun, apply a controlled bead of filler along the gap. Work in short sections and avoid overfilling the joint. The aim is to fill the void while keeping the repair as neat as possible.
Step 6: Smooth and remove excess
Immediately smooth the filler according to the product instructions and remove excess material from the surrounding floor. A clean, damp sponge may be suitable for some products, but always follow the manufacturer’s directions to avoid affecting the existing finish.
Step 7: Allow the repair to cure
Leave the repaired area undisturbed for the full curing period recommended by the manufacturer. Avoid heavy foot traffic, wet cleaning and dragging furniture across the repair until it has fully cured.
A no-sanding repair can improve the appearance of stable gaps, but it is not suitable for every timber floor. Large or irregular gaps, loose boards, raised boards and recurring movement may require a more comprehensive repair or professional assessment.
The Benefits of Filling up gaps in an old wooden floor
Many homeowners think of gaps only in terms of an aesthetic nuisance, but the truth is that when the gaps are filled in an older wooden floor, the liveability, hygiene and thermo insulation of your home will be transformed.
Save Money on Your Heat Costs
In older melbourne homes timber floors are frequently fitted over stumps but there is nothing but flowing cold air underneath. Big gaps between boards create a wind tunnel which draws the cold draught through to your living room in July and August. These gaps can be filled with timber slivers (or resin) to significantly enhance the home’s thermal envelope. The house will be much easier and less expensive to heat, and will save you money on your energy bills over time.
The application of hygiene and pest control measures.
Dirt is prone to accumulating in gaps. Over the years, these holes accumulate years of dust, pet hair, food crumbs, and tiny bits of debris that fall in the holes.These holes collect years and years of dust, pet hair, dropped food crumbs and little bits of other debris that fall in the holes, no vacuum cleaner in the world can pull up these things. Even worse, if there are gaps, they create a clear path for spiders, ants and other pests to invade your home from the subfloor. Sealing the floor forms a barrier that is completely impenetrable and very difficult to contaminate, creating a hygienic barrier that is extremely easy to maintain.
Aesthetic Perfection and Value
A well-designed room can be let down by visible gaps between timber floorboards. Filling and repairing these gaps can create a more consistent, uninterrupted appearance while allowing the natural grain and character of the timber to remain the focus. For homeowners preparing a property for sale, a carefully repaired, sanded and professionally finished timber floor can also create a cleaner and more well-maintained impression for potential buyers.
Why Gaps Appear and When They’re Normal
Small gaps between timber floorboards are not always a sign that the floor needs to be repaired. Timber naturally responds to changes in humidity, so minor seasonal gaps can open and close as the boards gain or lose moisture. Fine, consistent gaps of around 1mm to 2mm, particularly in older timber floors, can often be considered normal when the boards remain firmly in place and the floor surface is level.
The size and appearance of the gap are important indicators of whether further investigation is needed. A gap that remains noticeably wide, continues to increase, or appears in only a few areas may indicate excessive timber shrinkage, loose boards or an underlying flooring issue. Uneven gaps, boards that move or bounce underfoot, squeaking around the affected area, or boards that are lifting above the surrounding floor should not simply be covered with filler.
Before choosing a gap-filling method, check whether the boards are secure, whether the floor remains level, and whether the gaps change significantly between humid and dry periods. Cosmetic filling is appropriate for stable gaps, but movement, raised boards or suspected subfloor problems should be assessed before any filler is applied.

Common Problems or Mistakes When Fixing Gaps
If you can’t identify and work around these problems, you can expect a worse looking floor than when you started out.
1. You can use the Rigid Wood Putty made at the hardware store.
The most frequently committed homeowner’s error is purchasing a box of regular, inexpensive wood putty and putting it in the spaces. Hard wood putty cures similar to concrete. Timber tends to expand during the winter months and will compress the putty which is firm as rock. Within six months, the filler will break shatter, crack and pop out in tiny sharp fragments all over your floor creating an awful mess. Filler should be elastic.
2. Filling the Floor in the Dead of Winter
Timing is important when filling gaps in timber floors. During periods of higher humidity, such as winter in Melbourne, timber can absorb moisture and expand, causing existing gaps to become smaller. In the drier summer months, the boards can lose moisture and contract, making gaps more noticeable. Filling a gap while the boards are at their most expanded can therefore mean that the repair is placed under greater movement as the timber contracts again. This is why the width and condition of the gaps, as well as the seasonal movement of the floor, should be considered before choosing a repair method. For homeowners in Hawthorn looking for a more dimensionally stable flooring option, high-quality engineered timber flooring can be a practical alternative, as its cross-layered construction is designed to reduce movement compared with solid timber.
3. Not taking care of any structural subfloor problems.
However, in some cases, wider gaps are not due to shrinkage but because the house has settled, the flooring joists are rotting or the floor boards are loose. If a board is bouncing when stepping on it, there will be no filler in place. The rubbing of the bouncing board will pulverize the filler to dust in days. Before cosmetic fillings, the boards have to be structurally fastened and re-nailed.
How to Do It Right
If you are dedicated to getting a professional job done, there are some tips to keep in mind when completing the restoration.
Use a Full Restoration in combination with Filling.
The ideal time to deal with gaps is at a complete sand and polish. It’s very challenging to fill small openings in a glossy, finished floor since the filler will smear the shiny, polyurethane floor. The floor is totally raw when it is done during the sanding process, which means that the resin/slivers can be shaved down flat to the same level as the floor before the clear coating.
Clean Gaps First – Meticulously
A timber sliver or caulking will not stick to eighty years of compacted dirt. Aggressively clean out the gaps before trying any filling method! Apply a scraper, an old flathead screwdriver or a special hook tool to pull the compacted dirt and then vacuum with a high-powered vacuum. Filler must have raw clean wood on both sides of the gap to keep it in place.
Understand the importance of breathing on the floor
Remember, do not panic over each and every hairline fracture. There is no problem if there are small gaps (about 1mm) between the polished floorboards because the floor can breathe. If they are filled too tightly, the floorboards can begin to buckle and warp upward on rainy days when the air is humid, as the floorboards have no space to expand. When you need an absolutely flat floor with no gaps, and you want it to be done right, you may need to install new solid hardwood flooring melbourne that’s kiln-dried and acclimatised to today’s specifications.

When to Hire a Professional
A floor gap filling in a bedroom using flexible acrylic material may be a weekend project, but a full-fledged floor gap filling is quite technical and artisan work.
Handling hundreds of pieces of timber requires a lot of patience, some specialist chisels, block planes and knowledge of wood grain to cut, glue and plane. Additionally, industrial drum sanders are needed to collect the appropriate and clean dust for the optimal resin-sawdust combination.
When you have massive draughts or sufficient dirt problems within your home or just want a stunning finish in a seamless manner, it’s time to call the professionals. By hiring a master tradesperson in Timber Flooring Melbourne, you can be sure that the right approach is being taken to your space, that the structural strength of the boards has been verified and that the finished product will be wonderfully smooth and provide a significantly increased warmth and value to your home.
Avoid a damp, unpleasant floor by transforming them today.
If you haven’t liked black gaps and cold draughts creeping up through your floorboards, it may be time to restore your timber floors. At Boss Timber Flooring, our experienced Timber Flooring Installers and master craftsmen specialise in the art of timber floor restoration. From complete sand and polish services to traditional timber slivers for gap filling, we provide seamless, long-lasting repairs that preserve the character of your heritage home while improving its comfort and appearance. Contact our Melbourne team today for a free consultation and quote, and let our professional timber flooring installers restore your old timber floors to their former beauty.
Aftercare for Filled Timber Floor Gaps
Once the gaps have been repaired, proper aftercare helps protect both the timber and the filler. Timber flooring will continue to respond to changes in indoor humidity, so maintaining a relatively stable environment can help reduce excessive seasonal movement.
Keep the floor dry and clean using cleaning products recommended for the existing finish. Avoid soaking the boards with water and clean spills promptly. Place protective pads under furniture and lift heavy items rather than dragging them across the floor.
It is also worth checking the repaired areas periodically, particularly after periods of very dry or humid weather. Minor changes in gap width can be part of the natural movement of timber, but cracking, separation, loose boards or newly raised sections may indicate that the underlying issue needs further attention.
FAQs
1. What are the most reliable Methods To Fill Gaps In Wood Flooring?
For gaps under 3mm, a resin and sawdust mixture (applied during sanding) provides the best colour match. For gaps over 5mm, gluing in solid timber slivers is the most durable, long-lasting method.
2. Can I use standard wood putty for FIlling up gaps in an old wooden floor?
No, you should never use standard hard wood putty between floorboards. Because timber naturally expands and shrinks with the weather, hard putty will quickly shatter and crack out. You must use flexible acrylics, resin, or timber slivers.
3. How to Fix Gaps in Hardwood Floors without sanding the whole room?
If you do not want to sand the floor, the best approach is to meticulously clean out the gap and apply a colour-matched, flexible acrylic timber caulking. It can be wiped clean with a damp sponge without damaging the existing polish.
4. Should I be worried about small Gaps Between Polished Floorboards?
Not necessarily. Very small, hairline gaps (1mm to 2mm) in old floors are perfectly normal. They allow the timber to expand during humid, wet Melbourne winters without the floorboards buckling or warping under the pressure.


