
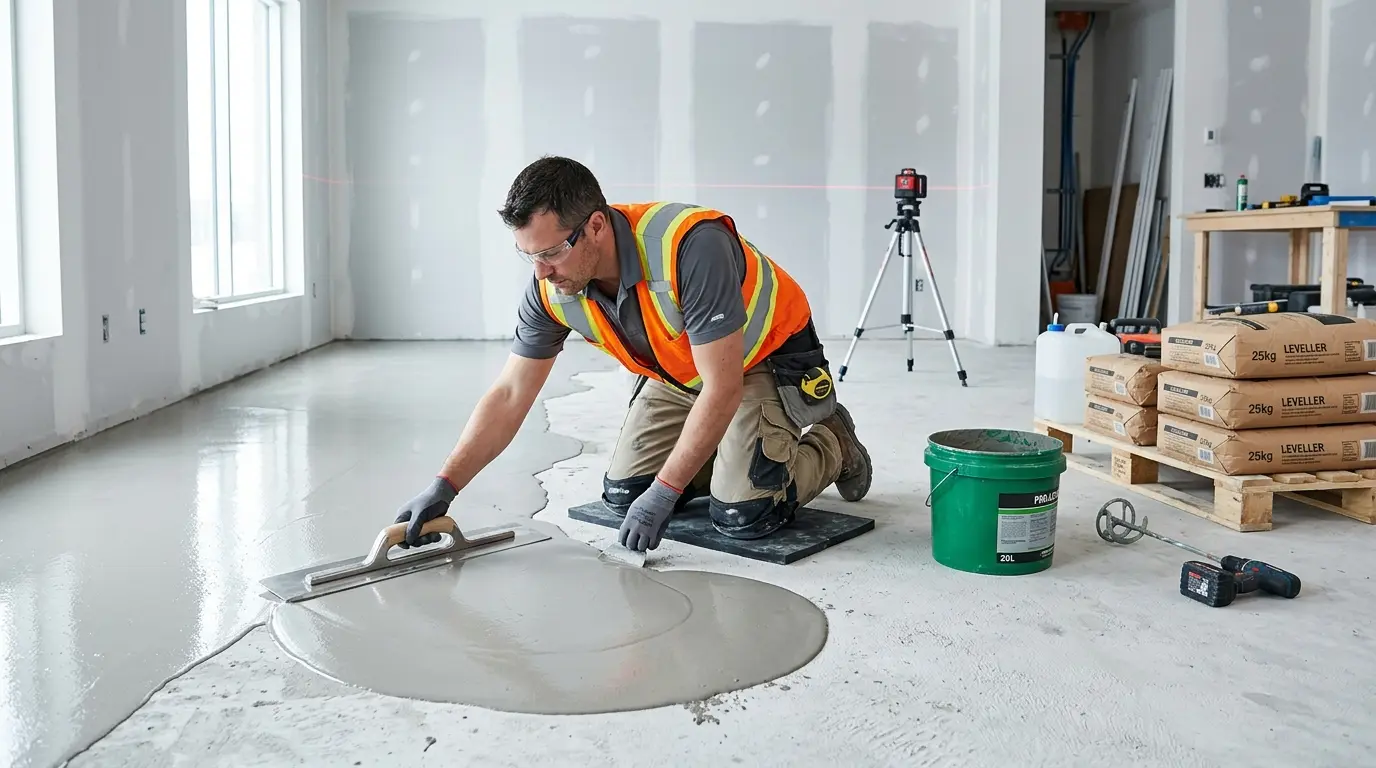
Proper subfloor preparation is the absolute foundation of a successful floor handover, directly dictating whether your new timber boards remain flat, silent, and structurally sound for decades or suffer premature failure. Following a rigorous subfloor preparation guide ensures that any minor imperfections, deep subfloor moisture issues, or structural unevenness are completely eliminated before a single plank is laid. In Melbourne, where shifting seasonal humidity and sudden temperature swings can heavily stress newly installed floors, addressing your underlying base surface prevents costly cupping, crowning, and joint separation. Let us examine the core parameters required to establish a flawless base in the quick reference chart below.
| Feature | Concrete Subfloor | Timber Subfloor |
|---|---|---|
| Primary concern | Hidden moisture and surface irregularities | Mechanical stability and joint alignment |
| Drying time required | Up to 1 month per 25mm of slab thickness | No drying cure time — inspection focused |
| Surface preparation method | Diamond grinding to remove laitance layer | Orbital sanding to smooth sheet joints |
| Moisture barrier required | Yes — commercial-grade epoxy moisture barrier | Not always — depends on crawl space ventilation |
| Ventilation requirement | Not applicable | Critical — cross-ventilation under bearer-and-joist system must be unobstructed |
| Fastener inspection needed | No | Yes — rusted screws replaced, protruding nails sunk below surface |
| Self-levelling compound use | Yes — after grinding and priming | Sometimes — used to smooth panel joint height differences |
| Primer required | Yes — acrylic or polyurethane subfloor primer before levelling compound | Not typically required |
| Moisture testing method | Calibrated concrete moisture meter or relative humidity floor probes | Visual inspection plus moisture meter checks |
| Common failure risk | Laitance separation, rising damp, adhesion failure | Sheet buckling, subfloor flex, squeaking joints |
| Flatness tolerance | Maximum 3mm variance over a 3-metre radius | Maximum 3mm variance over a 3-metre radius |
Subfloor Requirements for Timber Flooring: The Core Foundations
For any builder, architect or property owner who want to invest in the high quality natural surfaces, it is important to know exactly what the subfloor needs to be for timber flooring. The structural subfloor under your finished flooring can be made of poured concrete slabs, thick structural plywood sheets, particleboard flooring or old tongue-and-groove timber joist systems. Irrespective of its material, timber is an organic, hygroscopic substance which is continually reacting with its surroundings. Thus, the subfloor needs to be extremely flat, dry and structurally sound to assure a long lasting investment.
The first basic requirement is absolute structural integrity. When a subfloor flexes, sags or moves when stepped on, the finished timber top floor will follow, causing it to move. As time goes on, this micro-movement strains the tongue and groove profiles or the modern click-piece joints, causing split seams, squeaking and showing structural gaps. When homeowners wish to access top-tier products, such as a wood flooring Blackburn that provides superior performance, it is crucial to assess the base material. If the base is old particle board or sheet flooring, it should be inspected carefully to determine if it is water damaged, buckling at the sheet joints, or loose at the sheet joints.
In addition, conditions in the atmosphere need to be controlled. Natural wood planks have a natural tendency to swell and shrink in width in response to changes in ambient moisture. If the moisture is constantly being fed to the bottom side of the floorboards by a subfloor and the top side is being dried by the indoor air conditioning, an uneven moisture profile will be created in the timber. This directly causes the planks to become cupped, causing the edges of the planks to curve up. A solid foundation of a dry, stable subfloor that is 100% separated from water sources outside the subfloor is a crucial standard to meet in order to achieve a successful installation.
“It is critical that slabs are sufficiently dry to accept the flooring to avoid cupping, inadequate adhesion and expansion related issues.”
Source: WoodSolutions – Flooring

Preparing Concrete Subfloor vs Timber Subfloor
The engineering methods, specialized equipment and chemicals used for preparing concrete subfloor systems are quite distinct from those used for a pre-existing timber framework. The lack of them could cause adhesion failure or serious material deterioration.
Preparing Concrete Subfloors
Concrete slabs poured are ideal for a heavy, solid base, but are very susceptible to pockets of moisture hidden in the concrete and surface irregularities.
- Much longer: New concrete slabs take an unusually long time to dry out completely – up to one month drying time per 25mm slab thickness.
- Laitance Removal:During pouring and trowelling a milky surface layer of fine aggregate and cement known as laitance forms. Direct fastening of timber boards on laitance will eventually result in it pulling away from the boards due to movement under tension, leading to the unbonding of the floor. To loosen this layer, mechanical diamond grinding is needed to break the pores in the concrete.
- Chemical Sealing: Chemical Sealing is used after the timber has been ground cleaned to seal the deep-seated alkaline moisture from rising into your timber installation, using commercial grade epoxy moisture barrier.
Preparing Timber Subfloors
A wood substrate calls for a completely different approach that is based on mechanical stability and the alignment of the joinery.
- New sheet joints need to be inspected: Any rusted screws need to be replaced and any nails that are protruding need to be sunk back down below the top layer.
- Under-floor Ventilation: Wooden subfloors constructed over standard bearer-and-joist underlays are very dependent on cross-ventilation of the subfloor. If moisture is accumulated in the crawl space beneath the home, the wood will be warped from below and absorb moisture. Installers should make sure that external air vents are not blocked or obstructed.
Old particleboard or plywood will need to be sanded to create a smooth, continuous surface between the joints, and to do this, heavy-duty orbital sanders are needed for the joints to be propped up and then sanded.

Floor Leveling Before Installation: Common Problems and Mistakes
The key to a masterfully crafted floor, as opposed to a do-it-yourself effort, is a well done job of floor leveling done before installation. Unfortunately this stage is often rushed and results in significant architectural and functional problems that are only noticed after six to twelve months of the hand-over of the building.
One of the most common problems faced by property owners and less experienced tradespeople is using thin foam to cover an uneven floor base. The underlays that have good acoustic performance and offer a little thermal insulation have no load-bearing capacity. The timber floorboards will bridge over a low area when an underlay is used over a large depression, or over a high area on a concrete slab. If a person steps on that specific area, the board bends down towards the void. This will cause a very obvious “hollow” gait and place tremendous mechanical demands on the interlocking joints.
[ Timber Floor Plank ] <– Bridges over depression, flexing downward under foot traffic
======================
[ Foam Underlay ]
———————-
\_ Low Spot Void _/ <– Subfloor imperfection that should have been levelled
[ Concrete Slab ]
However, in complex and detailed patterns like Parquetry Flooring Melbourne, subfloor flatness becomes even more paramount. Since the parquetry is formed of hundreds of small, geometric timber blocks arranged in a complex herringbone or chevron pattern, even a small (1mm) difference in the subfloor will cause the corners of the blocks to end up uneven, and thus in a rough, uneven condition throughout the floor surface area.
Secondly, using self levelling compounds on unprepared bases is a common error. A clean, stable substrate is essential for the poured levelling liquids to adhere to it. If a contractor pours the compound over a concrete slab that is covered with drywall dust, old paint overspray or powdery plaster residue, the liquid compound will not stick to the surface. It will crack, delaminate and turn to loose powder under your new timber floor, causing crunching noises whenever you walk over the room.
Timber Flooring Installation Prep: Crucial Tips for Success
Your installation team should work with a very systematic and highly disciplined approach to ensure your timber floor installation is prepared to the highest standards of the industry. Here are the critical steps you need to take to follow before you open your first box of flooring material.
Follow the 3-Metre Rule: Don’t risk working on an uneven floor! Use a rigid 3 metre straight metal piece to measure the entire surface. Move the straightedge aroun the room in a grid pattern, any hole under the bar greater than 3mm will be identified with builder’s chalk. The high spots should be smoothed with a dustless diamond cup grinder and the low spots should be filled with the highest quality fiber reinforced cementitious smoothing compound.
Avoid omitting the Subfloor Primer: If applying self-levelling compounds on concrete, always use a good, manufacturer-recommended acrylic or polyurethane subfloor primer first. The primer is used to seal the pores in the porous concrete, to not draw the water out of the levelling mix too fast and to establish a good mechanical bond.
Scrape and clean thoroughly – use heavy duty floor scrapers to clean up all marks of old builder’s debris, plaster drops, paint splashes and old carpet glue. Clean with an industrial strength vacuuming pass to get rid of all fine dust particles in the room. The Timber to Acclimatise: Real timber boards need to acclimate to the temperature and humidity of their new home. The flooring boxes should remain flat in the rooms where they are to be stored for a minimum of 5-7 days with the temperature control system operating at normal home living temperatures prior to installation.
Use Calibrated Concrete Moisture Test or a Relative Humidity Floor Probe to Conduct Documented Moisture Tests: Always use a calibrated concrete moisture meter or relative humidity floor probes to check your subfloor. Make sure to take measurements very carefully, and make sure they precisely match your flooring manufacturer’s warranty instructions.

When to Hire a Professional for Subfloor Engineering
Individual timber floorboards can be an incredibly rewarding project, but the subfloor grinding, testing and structural levelling is a highly technical process that requires specialist equipment and know-how. Subfloor engineering is a job with a lot of weight and physical strain, and can’t be done wrong. A commercial planetary vacuum system is used to work with industrial diamond floor grinders and epoxy resins with multiple parts to provide a flat and safe result, which requires formal training.
When working with an experienced team, there is a guarantee that testing of the project will be undertaken with modern testing equipment, such as non-destructive impedance meters and relative humidity hygrometers, to ensure that no moisture problems are found within the subfloor prior to installation. Even the highest quality timber boards can warp or fail if the subfloor surface is not properly prepared. Any Floor Sanding & Polishing Service Melbourne, no matter the quality, cannot correct the structural movement, hollow bouncing or squeaking that is the result of the foundation being unlevelled.
A wise choice in advance will be to invest in professional preparation so that your subfloor is able to satisfy all the rigorous standards for a lasting finish. By collaborating with expert specialists in Timber Flooring Melbourne, you can rest assured that your manufacturer warranty will be fully protected, safeguarding your investment and providing your home with a stunning, upscale appearance that will endure for many years.
FAQs
What are the primary subfloor requirements for timber flooring installations?
The subfloor must be structurally sound, perfectly clean, completely dry, and exceptionally flat. Industry standards dictate that there should be no more than a 3mm variance across a continuous 3-metre radius. Any moisture issues must be resolved or sealed off before laying down real timber planks.
Why is floor leveling before installation so critical for engineered or solid timber?
If you install timber flooring over an uneven surface, the planks will bridge across the low spots, leaving empty voids underneath. When walked upon, the wood flexes down into these spaces, creating hollow clicking sounds, causing the planks to bounce, and putting major structural stress on the interlocking joints.
How do you approach preparing concrete subfloor slabs compared to wooden ones?
Concrete subfloors require thorough diamond grinding to remove weak surface laitance, followed by a professional epoxy moisture barrier to block rising dampness. Wooden subfloors focus on mechanical stability, requiring installers to fix loose sheets, sand down uneven panel joints, and verify that there is adequate cross-ventilation in the crawl space below.
What happens if timber flooring installation prep is rushed or skipped?
Skipping the preparation phase often results in significant structural issues down the track, including cupping planks, loose boards, split joints, and loud, persistent squeaks. Furthermore, installing timber over an uneven or damp subfloor will void your manufacturer’s warranty, leading to costly repair bills.


