
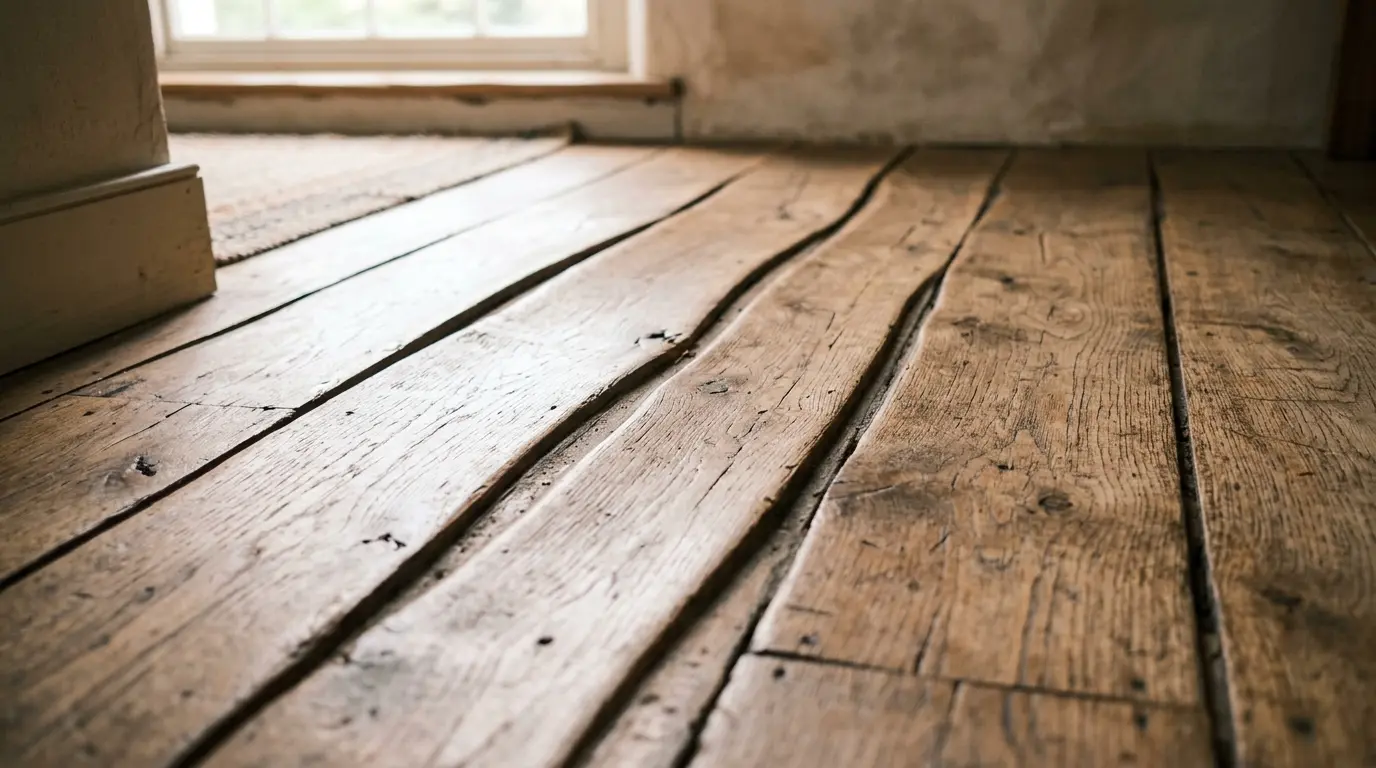
Your warped floorboards are caused by an underlying moisture imbalance between the top surface of the wood and its subfloor base. When the bottom of a wood plank absorbs more dampness than the top, it swells and pushes the edges upward (cupping); conversely, if the top absorbs more moisture or the core dries out rapidly, the center arches upward (crowning).
| Distortion type | What it looks like | Root cause | Correct fix | |
|---|---|---|---|---|
| Cupping | Edges of each plank lift upward; floor feels ridged underfoot | Excess subfloor moisture absorbed by the board’s base while top surface stays dry | Eliminate moisture source → allow slow natural drying → assess for sanding only when fully dry | |
| Crowning | Center of plank arches upward; edges sit lower than the middle | Top surface absorbs moisture (e.g. liquid spill) while subfloor stays dry — or premature sanding of a cupped floor | Identify and stop the top-surface moisture source; allow full drying before any mechanical work | |
| Buckling | Planks pull away from subfloor entirely; visible lifting or tenting | Prolonged, severe moisture saturation causing boards to break free from adhesive or fasteners | Professional structural assessment; likely full or partial board replacement | |
| Surface checking / splitting | Fine cracks running along the grain; rough or splintered surface feel | Rapid forced drying (industrial heaters or direct radiant heat) causing thermal shock to wet fibres | Do not use forced heat to dry timber — slow air movement and dehumidifiers only; specialist repair required | |
| Squeaking / loose boards | Planks move or creak underfoot; audible friction between boards | Tongue-and-groove joints broken down by long-term warp stress and foot traffic over distorted boards | Re-secure loose fasteners; replace boards with failed interlocking joints; address subfloor moisture |
What Causes Warped Timber Floorboards?
If you want to understand how to fix warped floor boards, you first need to know the reason for warped timber floor boards, which requires seeing wood as a living, breathing organic substance. The cellular structure of timber is highly hygroscopic even after timber has been cut, milled, kiln dried and made into high quality flooring. This implies a continuous exchange of moisture with the surrounding air and thus an Equilibrium Moisture Content (EMC). As the relative humidity (RH) increases in a room, the water vapor is absorbed by the wood cells causing them to expand, and when the air dries out the water vapor is released from the wood cells causing them to contract. The effect is a natural phenomenon and is perfectly normal, as long as it occurs evenly throughout the board profile.
The structural distortion starts when there is a substantial, long term moisture gradient between the top surface that is wearing and the bottom surface that is resting against the base. When the vapor emission rates of the concrete slab slab are high or when there is no cross-ventilation in a subfloor crawl space, excess moisture builds up under the floorboards. The lower portion of the timber absorbs this moisture to the extent that it is very swollen, whereas the upper surface with its indoor heating or ambient air is relatively dry.

The bottom of the board is wider than the top, the mechanical forces naturally push the outer edges of the plank upwards and this is referred to as cupping. The opposite, however, if a large liquid leak gets saturated on top of the wood while the subfloor stays dry, the center of the wood will curve upwards and become “crowned”, which is another form of floor warping.
Not every case of floorboard distortion originates from a moisture source. A second, entirely mechanical cause sits at the installation stage itself: insufficient expansion clearance around the perimeter of the room. Timber flooring is engineered and installed to move — it must have room to expand laterally as it takes on seasonal moisture, and to contract again as conditions dry. Australian Standard AS 1884 specifies a minimum perimeter gap for this exact reason.
When that clearance is omitted or undersized during installation — often to avoid a visible gap under skirting — the boards have nowhere to go as they expand. The timber pushes against the wall line instead, and that lateral force has to release somewhere: typically upward, in the form of ridging or lifting along the affected wall. Unlike moisture-driven cupping, this distortion won’t resolve with dehumidification, because the underlying issue isn’t excess moisture at all — it’s a structural constraint from day one. Correcting it involves removing the skirting, trimming back the affected boards to reinstate a proper expansion joint, and refitting the skirting to conceal it.
This is precisely the kind of defect that’s difficult for a homeowner to diagnose correctly without experience, since the visual symptom can closely resemble mild cupping. If you’re unsure which of the two you’re dealing with, call our team on 1800 425 425 — a quick assessment will tell you whether you’re looking at a moisture problem or an installation one, and the fix is very different for each.
The Serious Structural Impact of Cupping and Crowning Floors
When the early signs of cupping and crowning floors are ignored, a small moisture problem can rapidly escalate from a small to potentially large structural problem. As planks start to warp, the shape of the plank changes, not only making it look bad, but also it upsets the locking joints and fasteners that keep the entire floor layout intact. The edges of cupped boards lift up to form little ridges throughout the house. These ridges are subjected to a tremendous amount of regular foot traffic and constant friction that will wear out the clear coats of polyurethane protecting the wood and expose the raw wood to stains, dirt and day to day spillages.
The repeated wearing and tearing of the floor as people walk on it over time will break the internal tongues and grooves of the boards. The consequence of these interlocking joints failing is that planks become structurally separate from each other, causing the floor surface to squeak, sections of floor to become loose and boards to shift out of alignment, which can contribute to warping floorboards over time.
In addition, if the warping becomes so extreme that hardwood floors become buckled, the planks may even pull completely out of the glue bed or rip their nails out of the subfloor. This is left unsealed creating large air pockets below the wood. This is when the floor becomes unsafe to walk on as it becomes a clear trip hazard, and a complete structural renovation is needed, not just a clean-up.
Cross-Section of Timber Floorboard Cupping:
Raised Edge Raised Edge
(Swollen) (Swollen)
▼ ▼
┌──┐ ┌──┐
│ └──────────────────────────────┘ │
│ Dry Top Surface │
│ ┌──────────────────────────────┐ │
└──┘ └──┘
▲ ▲
└──────────────┬─────────────────┘
Swollen Wet Base
(Subfloor Moisture Source)
Common Mistakes When Managing Wood Floor Moisture Damage
Unfortunately, when homeowners see the first signs of moisture damage to their wood floors, they tend to make reactive errors that worsen the warping. The worst approach is to start sanding floorboards with heavier sanders before the wood has dried out. When sanding the raised, swollen edges of a cupped floor when the subfloor is still damp, important sections of wood are being lost from the borders of the plank.
The places you sand down will sink when the moisture source is ultimately repaired and the wood base shrinks back to normal size. This makes your once-cuped floor into a crowned floor and your previously level planks permanently damaged and need to be ripped out and replaced.
A frequent error is allowing the floor to be dried from a water damaged state too rapidly by high temperature industrial space heaters or by direct radiant heat. Quick drying of wet wood cells produces extreme and unequal thermal shock. These result in high internal stresses in the grain, splitting the grain in depth, checking the surface, and permanently collapsing the wood fibres.
Also, many people are not aware of the source of the dampness, believing that it is a surface spill when really there is a slow, hidden plumbing leak behind the wall, garden drainage downside is inadequate or a damp-proof membrane under the concrete slab has failed.

Assessing the Severity: A Homeowner’s Triage Framework
Before any remediation begins, it’s worth understanding roughly what you’re dealing with — because the correct response, and the realistic timeline, differ significantly depending on how far the distortion has progressed. If the warping followed a clear water event, such as an appliance leak or a burst supply line, the first 24 to 48 hours are the most consequential window: standing water needs to be removed and the area actively dried within that timeframe to keep the damage in the “recoverable” category rather than the “structural” one.
A simple, non-invasive check can help you gauge where your floor sits before you call anyone:
- Press test: Apply gentle, even pressure to the affected boards. Softness or give underfoot suggests the timber has been absorbing moisture for some time.
- Smell and visual check: A persistent musty or damp odour, or any discolouration along the board edges, indicates the moisture source has likely been present for longer than a single spill would explain.
- Movement check: Boards that shift, creak, or feel loose against their neighbours point to compromised tongue-and-groove joints, which sits at the more serious end of the spectrum.
| Severity | What you’ll typically see | Realistic timeframe | What it usually needs |
|---|---|---|---|
| Light | Slight edge-lift on one or two boards, floor still feels solid underfoot | Can begin stabilising within days once the moisture source is controlled | Humidity control and monitoring; often resolves without mechanical intervention |
| Moderate | Visible cupping across several boards, no separation from the subfloor | Typically 2–4 weeks of controlled drying before reassessment | May flatten naturally; individual board replacement if it doesn’t |
| Severe | Buckling, boards lifting or separating from the subfloor, soft or hollow-feeling sections | Does not self-resolve with time | Professional structural assessment and likely board or section replacement |
If your floor sits anywhere in the moderate-to-severe range, or you’re simply not confident which category applies, this is exactly the situation a phone consultation resolves quickly. Call 1800 425 425 and describe what you’re seeing — we can often tell you over the phone whether it’s safe to wait and monitor, or whether it needs an in-person look sooner rather than later.
Practical Tips to Prevent and Remediate Uneven Timber Flooring
To prevent uneven wood floors from forming, you need a proactive approach to maintaining a stable relative humidity inside and eliminating moisture under the wood floor. The first line of defense is to maintain low humidity levels (45% – 60%) in the home at all times. This can be easily controlled with the use of modern reverse cycle air conditioners, by keeping extra bathroom dehumidifiers and kitchen dehumidifiers operating throughout the wetter periods of winter and ensuring all steam is vented directly outside from the exhaust fans of bathrooms and kitchens to adjacent living space.
Subfloor Moisture Remediation Checklist:
├── 1. Clear subfloor cross-ventilation vents of dirt and garden mulch.
├── 2. Install a continuous 200-micron polyethylene moisture barrier over raw soil.
├── 3. Ensure external ground levels sit at least 150mm below the internal floor line.
└── 4. Check storm-water downpipes for underground structural fractures.
Replace dripping mops with a microfiber flat mop and a pH neutral timber cleaner while cleaning your home. In case of an unplanned appliance leak or overflow, it is essential to take immediate action: use a wet/dry vacuum to extract the liquid, raise the skirting boards to let air flow into the space and place high velocity air movers to dry the area.
If you have a crawlspace under your house, periodically look under your house to make sure that your foundation vents are not covered with garden mulch, soil, or spider webs. Molded air can escape naturally through consistent cross-ventilation in the home, before it can find its way up underneath the home and into the underside of the floorboards.
According to the National Wood Flooring Association (NWFA), maintaining stable indoor temperature and humidity, together with effective moisture management beneath the floor, is essential to minimise cupping, gapping, and other moisture-related movement in timber flooring.
When to Hire a Specialist to Fix Buckled Hardwood Flooring
When the floors begin to lift or when individual planks begin to warp into a pronounced wave pattern, the solutions you can provide yourself will no longer cut it. When a floor is structurally distorted, there is a need to be able to locate the exact movement of concealed moisture, which can only be done using commercial grade diagnostics, such as concrete impedance meters and deep-wall pin probes. A professional flooring specialist will be able to accurately map the moisture profile of both the timber and subfloor, and will know exactly when the wood has been stable enough to proceed with any structural leveling or sanding.

If your home’s original floorboards have suffered permanent structural collapse from long-term water damage, it may be the perfect opportunity to upgrade to a premium, professionally installed layout. Transitioning to a high-density, expertly acclimated Solid Timber Flooring Melbourne system ensures your home benefits from exceptional structural stability and a thick, resilient wear layer that can handle natural environmental shifts beautifully.
What Professional Board Replacement Actually Involves
Homeowners often assume that replacing a warped section is a straightforward matter of pulling out the damaged boards and dropping in new ones. On a genuine timber floor, it’s a more deliberate process than that, and the difference shows in how well the repair blends with the rest of the floor.
A proper repair typically follows a clear sequence: the extent of the damage is assessed, including whether the subfloor itself has been affected; the damaged boards are extracted carefully so surrounding, undamaged timber isn’t scarred in the process; replacement boards — matched as closely as possible in species, grade and width — are acclimatised to the room before they go anywhere near the floor, exactly as they would be for a new installation; the new sections are then “laced in,” woven into the existing pattern rather than simply butted against it, so the repair reads as part of the original floor rather than an obvious patch; and finally, the area is sanded, stained and finished to match the surrounding boards’ colour and sheen, accounting for the natural fading that occurs on timber that’s been down for years.
Skipping any one of these steps is usually what causes a “repaired” section to still stand out months later. It’s a job that rewards experience, and it’s exactly the kind of work we handle as part of our Solid Timber Flooring and repair services.
For homeowners living across the leafier eastern suburbs who need specialized local advice on soil moisture conditions and foundation stability, partnering with an expert team focused on wood flooring Box Hill projects guarantees your subfloor preparation meets strict Australian Standards (AS1884). Professional installers will check your subfloor’s relative humidity and apply heavy-duty, trade-grade epoxy moisture barriers before a single plank is laid, ensuring your new investment remains perfectly flat, stable, and beautiful for decades to come.
FAQs
Why are my floorboards warping up at the edges?
This is known as cupping. It happens when the bottom of the wood plank absorbs more moisture than the top surface, causing the base of the timber to swell and naturally force the outer edges upward. Common causes include high subfloor humidity, damp crawl spaces, or concrete slab vapor emissions.
Can cupped timber floors go back to being flat naturally?
Yes, if the moisture imbalance is caught early and fixed completely, cupped floorboards can return to their original flat shape as the wood dries out evenly. However, this drying process must happen slowly and naturally; if the timber remains wet for too long, the wood fibers can take on a permanent structural set.
Is it safe to sand warped timber floorboards right away?
No, you should never sand a floorboard while it is actively cupped or wet. Sanding down the raised edges of wet timber permanently removes vital wood mass. Once the floor eventually dries out and shrinks back to its normal shape, the areas you sanded will sink, leaving you with permanently uneven and ruined planks.
How long does it take for timber floors to dry out after a water leak?
Depending on how deeply the water penetrated, the specific species of wood, and the indoor airflow, a timber floor can take anywhere from three weeks to several months to dry out completely. Using commercial dehumidifiers and high-velocity air movers can safely speed up this timeline.


2 Responses
Thanks for the helpful guide! I’ve recently noticed a few floorboards in my dining room starting to lift slightly after a plumbing leak was repaired. The damage isn’t severe yet, but I’m worried it could get worse. Is it possible to repair only the affected boards, or do warped timber floors usually need to be replaced completely?
Thanks for your question, David! In many cases, warped timber floorboards can be repaired without replacing the entire floor, especially if the problem is identified early. The first step is to make sure the source of moisture has been completely resolved. Once the floor has dried, we can assess whether the affected boards can be repaired, sanded, or replaced individually. If the warping is widespread or the boards have suffered significant structural damage, a larger restoration may be recommended. A professional inspection is the best way to determine the most cost-effective solution while preserving as much of your existing flooring as possible.